Pond Preparation and Soil Testing for Catfish Farming: Practical Guide
Posted on: 2025-11-19
By: Yomi Adisa
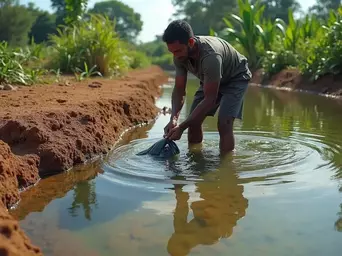
You've secured your land, sourced quality fingerlings, and you're ready to start your catfish farming venture. But before you fill those ponds with water and stock your fish, there's a critical step that determines whether your farm thrives or struggles: proper pond preparation and soil testing.
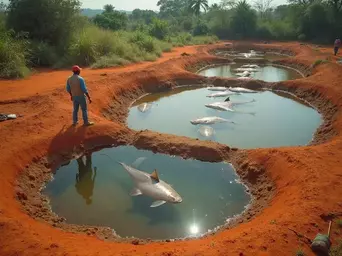
Many catfish farmers across Nigeria and Ghana learn this lesson the hard way when their ponds leak, water quality deteriorates, or fish growth stagnates despite quality feed and management. The difference between profitable and struggling farms often lies in the foundation—literally the soil beneath your pond.
This guide provides you with the technical knowledge to prepare your catfish ponds correctly from the start. You'll learn how to select the right site, test your soil for optimal conditions, and prepare your pond foundation to support healthy fish growth and maximum water retention.
Understanding soil composition, pH levels, and proper construction techniques directly impacts your catfish production outcomes. Well-prepared ponds maintain better water quality, reduce disease risks, and create the stable environment African catfish (Clarias gariepinus) need to reach market weight efficiently.
By following these practical steps, you'll avoid common preparation mistakes that cost farmers time, money, and fish mortality whilst building a solid foundation for consistent catfish production. Proper preparation also helps you avoid hidden costs that can significantly impact your farm's profitability over time.
What You Will Learn
- Learn how to assess potential pond sites for optimal soil composition and drainage characteristics.
- Discover effective soil testing methods to determine pH, alkalinity, and organic matter content necessary for catfish health.
- Master pond preparation techniques that ensure water retention and reduce risks of leaks and contamination.
- Understand the importance of proper site clearing and compaction for maintaining a stable environment for African catfish (Clarias gariepinus).
- Learn how to interpret soil test results to make informed amendments for optimal catfish growth.
Site Selection for Catfish Ponds
Your pond's location determines everything from water retention to fish growth rates, yet many catfish farmers choose sites based on convenience rather than technical requirements. A poorly selected site can cost you thousands in repairs, constant water top-ups, and stunted fish growth that extends your production cycle by months.
The difference between a profitable catfish operation and a struggling one often starts with three critical site factors: soil composition, drainage patterns, and sunlight exposure. African catfish (Clarias gariepinus) thrive in stable environments, and your site selection directly impacts water quality stability throughout the production cycle.
Smart site selection saves you money on construction, reduces ongoing maintenance costs, and creates optimal growing conditions for your catfish. Here's how to evaluate potential sites using practical field techniques that work across different African farming conditions.
Understanding Soil Types (Clay Content)
You need soil with at least 20-30% clay content to maintain proper water levels without constant refilling. Clay particles bind together when compacted, creating a natural seal that prevents water seepage through the pond bottom and walls. Sandy soils drain too quickly, whilst pure clay can crack during dry seasons.
Test your soil composition using the simple jar method: fill a clear jar one-third with soil, add water, shake vigorously, then let it settle for 24 hours. You'll see distinct layers—sand at the bottom, clay at the top, with silt in between. Measure each layer to calculate percentages.
Ideal catfish pond soil shows 20-30% clay (top layer), 40-50% silt (middle), and 20-30% sand (bottom). If your soil has insufficient clay content, you can improve water retention by adding bentonite clay at 1-2kg per square metre during construction.
Assessing Drainage and Flood Risk
You want good drainage around your pond site but not through it—water should flow away from your pond during heavy rains, not into it uncontrolled. Walk your potential site during the rainy season if possible, or examine it immediately after heavy rainfall to identify natural water flow patterns and potential flooding areas.
Look for subtle slopes that direct runoff away from your pond location whilst avoiding low-lying areas where water naturally collects. Your pond should sit slightly above the surrounding landscape to prevent contaminated runoff from entering your fish water.
Check with local farmers about historical flooding patterns in your area. In regions like the Niger Delta or areas near Lake Victoria, seasonal flooding can destroy poorly positioned ponds. Position your pond at least 50 metres from natural water bodies and 10 metres above the highest recorded flood level in your area.
Understanding proper pond sizing and positioning helps you avoid costly mistakes that affect your entire operation.
Sunlight Exposure
Your catfish pond needs 6-8 hours of direct sunlight daily to maintain optimal water temperature and support beneficial algae growth that produces natural oxygen. African catfish grow fastest in water temperatures between 25-32°C, and adequate sunlight helps maintain these temperatures naturally, reducing heating costs.
Observe your potential site throughout a full day, noting when shadows from trees, buildings, or hills block sunlight. Early morning sun (6-10 AM) is particularly important for warming water after cool nights, whilst afternoon shade can prevent overheating during peak temperatures above 35°C.
Avoid sites with large trees on the eastern or southern sides that block morning and midday sun. However, some afternoon shade from western trees can be beneficial in extremely hot climates. You can selectively remove smaller trees, but large established trees are expensive to remove and may be protected by local regulations in some areas.
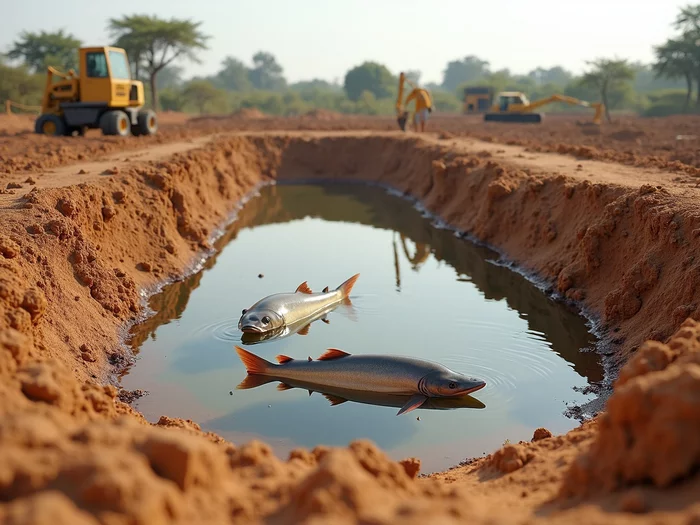
Soil Preparation and Testing
Once you've selected your ideal site with proper clay content and drainage, the real work begins with thorough soil preparation and comprehensive testing. This phase determines whether your pond will hold water efficiently, maintain stable pH levels, and provide the chemical foundation your African catfish need for optimal growth rates.
Many catfish farmers rush through soil preparation, eager to fill their ponds and stock fingerlings, only to discover leaks, pH problems, or contamination issues months later when fish growth slows or mortality increases. Proper soil preparation takes 2-3 weeks but prevents costly repairs and production delays that can extend your growing cycle by months.
The difference between a pond that maintains stable conditions and one that requires constant management lies in methodical soil preparation and testing. You'll save money on water bills, reduce chemical treatments, and create the stable environment that allows Clarias gariepinus to reach market weight efficiently.
Cleaning and Clearing the Site
You must remove all organic matter from your pond site before construction begins, as decomposing vegetation creates toxic hydrogen sulphide gas and depletes oxygen levels that stress your catfish. Clear all grass, weeds, tree roots, and debris from the entire pond area plus a 2-metre buffer zone around the perimeter.
Remove the top 15-20 centimetres of topsoil containing high organic content, exposing the mineral-rich subsoil beneath that provides better compaction and water retention. Store this topsoil separately—you can use it later for constructing pond levees or growing feed crops around your farm.
Burn or compost all cleared vegetation away from the pond site to prevent recontamination. In areas like northern Nigeria or central Kenya where termites are prevalent, treat the cleared area with appropriate termiticides to prevent future structural damage to your pond walls.
Soil Compaction and Sealing
You need to compact your pond bottom and walls to 95% density to achieve proper water retention without expensive liner systems. Use a mechanical compactor or heavy roller, working in 10-15 centimetre lifts whilst maintaining soil moisture at 12-15%. Properly compacted soil feels firm underfoot and shows no visible cracks or soft spots when walked on.
Add water gradually during compaction—soil that's too dry won't compact properly, whilst oversaturated soil becomes muddy and unstable. Test compaction by driving a 1-metre steel rod into the soil; it should penetrate no more than 15-20 centimetres with firm pressure.
For soils with insufficient clay content, mix bentonite clay at 1-2 kilograms per square metre into the pond bottom before final compaction. Bentonite swells when wet, creating an effective seal that reduces water seepage to less than 2 centimetres per week.
Soil Testing for Catfish Ponds
Importance of Soil Testing
Your soil chemistry directly affects water quality, fish health, and feed conversion efficiency throughout your production cycle. Soil pH influences nutrient availability, whilst alkalinity buffers against dangerous pH swings that stress catfish and reduce growth rates.
Testing reveals problems before you fill your pond, when corrections are still affordable and practical. Soil amendments cost ₦5,000-15,000 per pond before construction but can cost 10 times more to correct after stocking fish. African catfish tolerate pH ranges of 6.5-8.5, but optimal growth occurs between 7.0-8.0, which proper soil preparation can maintain naturally.
How to Collect Soil Samples
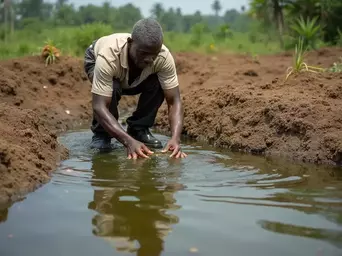
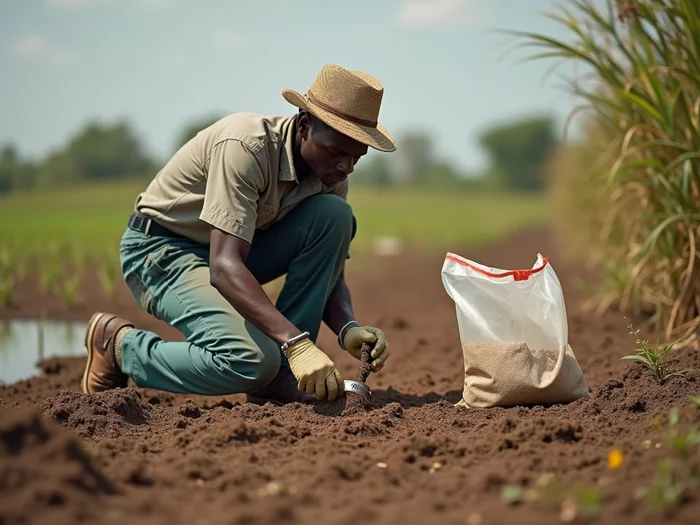
You need representative samples from multiple locations to get accurate results, as soil composition varies across even small pond sites. Collect samples from 8-10 points in a zigzag pattern across your pond area, taking soil from 0-15 centimetres depth where most chemical activity occurs.
Mix equal portions from all sampling points in a clean plastic bucket, then take 500 grams of this composite sample for testing. Label samples clearly with your farm name, pond number, and collection date. Store samples in clean plastic bags or containers, keeping them cool and dry until testing within 48 hours of collection.
Testing Parameters
Test your soil for pH, alkalinity, organic matter content, and clay percentage as minimum requirements for catfish pond construction. pH determines nutrient availability and affects fish stress levels, whilst alkalinity provides buffering capacity against pH fluctuations.
Use a digital pH meter for accurate soil pH testing, mixing 1 part soil with 2 parts distilled water and measuring after 30 minutes. Test alkalinity using titration kits available from aquaculture suppliers for ₦3,000-5,000. Many agricultural extension offices in Nigeria, Ghana, and Kenya provide soil testing services for ₦2,000-8,000 per sample.
Interpreting Soil Test Results
Your soil pH should fall between 6.5-8.0 for optimal catfish production, with 7.0-7.5 being ideal for consistent growth rates and feed conversion efficiency. Soils below pH 6.5 need limestone application at 1-3 tonnes per hectare, whilst soils above pH 8.5 require sulphur amendments at 200-500kg per hectare to lower pH gradually.
Alkalinity levels between 50-150 mg/L provide adequate buffering without creating hardness problems that stress fish. Low alkalinity soils need limestone or sodium bicarbonate additions, whilst high alkalinity may require gypsum treatment to balance water chemistry.
Proper water quality management starts with understanding your soil chemistry and making appropriate amendments before pond filling.
Pond Construction Techniques
With your soil tested and prepared, you're ready to begin the physical construction that transforms your prepared site into a functional catfish production system. The construction phase determines your pond's structural integrity, water retention capacity, and long-term maintenance requirements for the next 10-15 years of operation.
Your construction approach depends on your soil conditions, budget, and production goals, but certain principles apply regardless of pond type. Proper excavation depth, levee design, and compaction techniques create the foundation for consistent water levels and stable growing conditions that African catfish require for optimal feed conversion and growth rates.
Understanding the differences between earth ponds, concrete block construction, and plastic-lined systems helps you choose the most cost-effective approach for your specific site conditions and production scale. Each method has distinct advantages and soil requirements that affect both initial costs and ongoing operational efficiency. Similar earthen pond construction principles apply across different fish species, though catfish have specific depth and water retention requirements.
Excavation and Levee Design
You need to excavate your pond to 1.2-1.5 metres depth for optimal catfish production, allowing for 1 metre of water depth plus 20-30 centimetres of freeboard to prevent overflow during heavy rains. Start excavation from the centre, working outward to create gentle slopes of 2:1 (horizontal to vertical) that prevent wall collapse and provide stable fish habitat areas.
Use excavated soil to build levees around the pond perimeter, compacting each 15-centimetre layer to 95% density as you build upward. Your levees should rise 50-60 centimetres above maximum water level, with a top width of at least 1 metre for structural stability and maintenance access.
Install a monk system or standpipe for water level control during construction, positioning it at the deepest point of your pond. This allows complete drainage for maintenance, harvesting, and emergency water changes. Many catfish farmers in Ogun State and Ashanti Region use PVC pipe systems that cost ₦15,000-25,000 but provide decades of reliable service.
Compaction Techniques
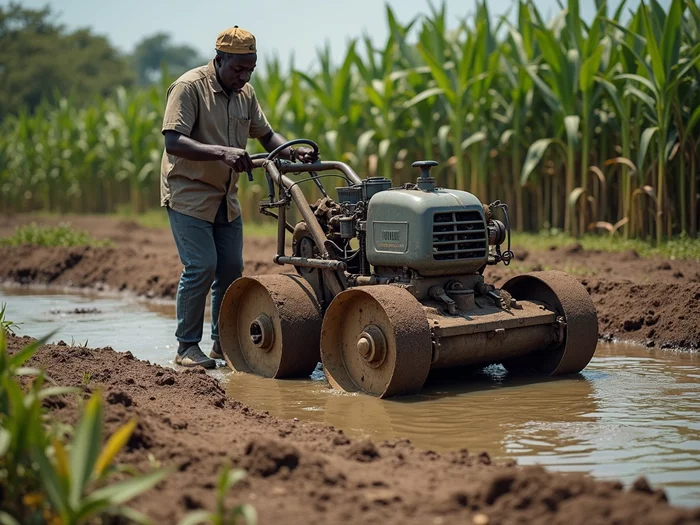
You must achieve 95% soil compaction throughout your pond bottom and walls to prevent seepage that wastes water and increases operating costs. Use a mechanical plate compactor or sheep's foot roller, working in systematic passes across the entire pond surface whilst maintaining soil moisture at 12-15% for optimal compaction results.
Test compaction using the proctor needle method: drive a 1-metre steel rod into compacted soil with firm pressure—properly compacted areas allow penetration of only 15-20 centimetres. Areas that allow deeper penetration need additional compaction passes.
For large ponds above 500 square metres, rent heavy compaction equipment from construction companies in major cities like Lagos, Accra, or Nairobi for ₦25,000-40,000 per day. This investment pays for itself through reduced water seepage and lower ongoing maintenance costs throughout your pond's operational life.
Differences Between Pond Types
Earth ponds offer the lowest construction costs at ₦800-1,500 per square metre but require clay-rich soil and regular maintenance to prevent seepage and erosion. They work well in areas with suitable soil conditions and provide natural biological processes that benefit water quality.
Concrete block ponds cost ₦3,000-5,000 per square metre but provide excellent durability and precise water level control regardless of soil conditions. They're ideal for areas with sandy or rocky soils where earth ponds would leak excessively.
Plastic-lined ponds combine moderate costs of ₦2,000-3,500 per square metre with reliable water retention in any soil type. Use 0.5-1.0mm HDPE liner over a sand base to prevent punctures from sharp objects or animal traffic.
Liming and Fertilisation for Pond Productivity
After completing your pond construction, you need to establish the proper chemical foundation that supports healthy catfish growth and natural food production before introducing your fingerlings. Liming and fertilisation create optimal pH conditions, enhance nutrient availability, and stimulate beneficial algae growth that produces oxygen and natural fish food.
Many catfish farmers skip this crucial step, eager to stock their ponds immediately after filling with water, only to experience slow growth rates, poor feed conversion, and higher mortality throughout their production cycle. Proper pond conditioning takes 2-3 weeks but establishes stable water chemistry that reduces disease pressure and medication costs.
The difference between ponds that maintain consistent water quality and those requiring constant chemical adjustments lies in thorough initial conditioning. You'll create an environment where African catfish can efficiently convert feed to body weight whilst natural biological processes help maintain water quality between production cycles.
Adjusting Soil pH
You need to achieve soil pH between 7.0-7.5 before filling your pond to ensure optimal nutrient availability and stable water chemistry throughout your production cycle. Apply agricultural limestone at 1-3 tonnes per hectare for soils testing below pH 6.5, spreading evenly across the pond bottom and incorporating into the top 10-15 centimetres of soil through light cultivation.
Calculate lime requirements using your soil test results: soils at pH 6.0 need approximately 2.5 tonnes per hectare, whilst pH 6.5 soils require 1.5 tonnes per hectare to reach optimal levels. Use agricultural lime with 85-90% calcium carbonate equivalent, available from fertiliser suppliers in major agricultural areas for ₦8,000-12,000 per tonne.
Allow 2-3 weeks after lime application before filling your pond, as the chemical reaction takes time to stabilise soil pH effectively. Test soil pH again after this waiting period to confirm proper adjustment before proceeding with pond filling and fertilisation.
Fertilisation Timing and Methods
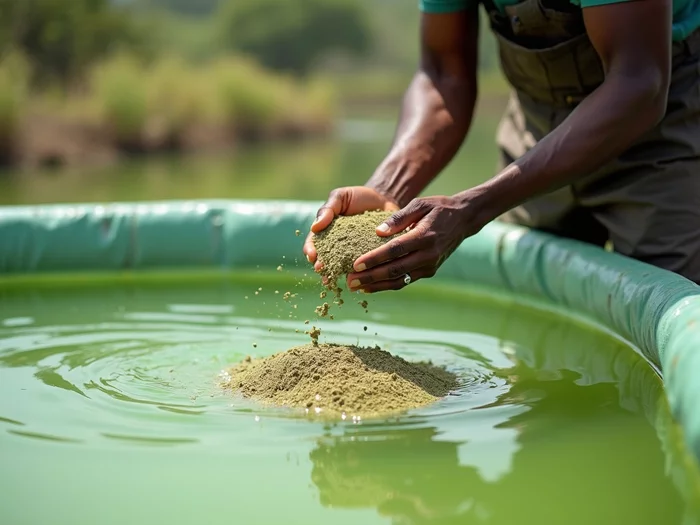
You should fertilise your pond 7-10 days after filling with water to establish beneficial algae populations that produce oxygen and natural fish food before stocking fingerlings. Apply organic fertiliser (chicken manure) at 500-1,000kg per hectare or inorganic fertiliser (NPK 15:15:15) at 100-150kg per hectare to stimulate phytoplankton growth that creates the green water colour indicating healthy pond conditions.
Spread organic fertiliser in shallow water areas where decomposition occurs rapidly, or use fertiliser bags suspended 30 centimetres below the surface to release nutrients gradually over 2-3 weeks. This method prevents sudden nutrient spikes that can cause oxygen depletion and fish kills in newly established ponds.
Monitor water colour changes after fertilisation—healthy ponds develop a light green tint within 5-7 days indicating proper algae establishment. Clear water suggests insufficient fertilisation, whilst dark green or brown water indicates over-fertilisation that can cause oxygen problems.
Monitoring Nutrient Levels
You need to track nitrogen, phosphorus, and potassium levels monthly to maintain optimal pond productivity without creating water quality problems that stress your catfish. Use aquaculture test kits to monitor ammonia (should be <0.5mg/L), nitrite (<0.1mg/L), and nitrate (10-40mg/L) levels that indicate proper nutrient cycling in your pond ecosystem.
Test phosphorus levels using colorimetric test kits available from aquaculture suppliers for ₦5,000-8,000—optimal levels range from 0.3-0.8mg/L for sustained algae growth without excessive blooms. Phosphorus deficiency shows as clear water with poor fish growth, whilst excess phosphorus creates dense algae blooms that deplete oxygen at night.
Record all test results in a pond management logbook, noting water temperature, weather conditions, and fish behaviour observations alongside chemical measurements. This data helps you identify patterns and adjust fertilisation schedules to maintain stable conditions throughout your production cycle.
Common Fertiliser Mistakes
You must avoid over-fertilising newly filled ponds, as excess nutrients create algae blooms that consume oxygen at night and can kill your entire fish stock within hours. Start with half the recommended fertiliser rate for new ponds, increasing gradually based on water colour response and algae establishment rather than following rigid application schedules.
Never apply fertiliser during hot, sunny weather when water temperatures exceed 32°C, as rapid algae growth combined with high temperatures can create dangerous oxygen depletion conditions. Apply fertilisers early morning or late evening when temperatures are cooler and oxygen levels are more stable.
Avoid using fresh chicken manure directly in fish ponds, as uncomposted organic matter creates toxic hydrogen sulphide gas and depletes oxygen during decomposition. Compost chicken manure for 4-6 weeks before application, or use commercially processed organic fertilisers that release nutrients safely without creating water quality problems.
Water Management Strategies
Effective water management forms the backbone of successful catfish production, directly influencing fish health, growth rates, and feed conversion efficiency throughout your production cycle. Your water management system must provide consistent quality and quantity whilst adapting to seasonal variations and production demands that change as your fish grow from fingerlings to market size.
Poor water management causes more catfish farming failures than any other single factor, yet many farmers focus primarily on feeding and stocking density whilst neglecting the water environment that determines whether fish can utilise feed efficiently. Proper water management reduces disease pressure, improves feed conversion ratios, and creates stable conditions that allow African catfish to reach market weight predictably.
Understanding water sources, quality parameters, and seasonal management adjustments helps you maintain optimal growing conditions year-round whilst minimising operational costs and labour requirements. Your water management strategy should anticipate problems before they affect fish health and provide practical solutions that work within your budget and local conditions.
Ensuring a Reliable Water Supply
You need a water source capable of supplying 150-200% of your total pond volume to account for evaporation, seepage, and emergency water changes during your production cycle. Borehole water provides the most reliable supply with consistent quality, though initial drilling costs range from ₦500,000-1,500,000 depending on depth and location across different African regions.
River or stream water offers lower initial costs but requires careful quality monitoring and may carry diseases, parasites, or agricultural chemicals that harm your catfish. Install settling ponds and basic filtration systems when using surface water sources, allowing 24-48 hours for chlorine dissipation and sediment removal before introducing water to fish ponds.
Municipal water supplies work for small-scale operations but become expensive for commercial production—calculate costs at current rates in your area, as water bills can exceed ₦50,000-100,000 monthly for a 1,000 square metre pond system. Consider rainwater harvesting systems that can supply 30-50% of your water needs during rainy seasons, reducing dependence on expensive municipal supplies.
Filtration and Oxygenation
You must maintain dissolved oxygen levels above 5mg/L throughout your pond to prevent fish stress and ensure optimal feed conversion, particularly during hot weather when oxygen solubility decreases and fish metabolism increases. Install paddle wheel aerators or fountain systems that provide 1-2 horsepower per 1,000 square metres of pond surface area for adequate oxygen levels.
Use biological filtration systems with gravel beds or constructed wetlands to remove ammonia and nitrites that accumulate from fish waste and uneaten feed. These systems cost ₦100,000-300,000 to construct but reduce water change requirements and maintain better water quality with lower ongoing operational costs than chemical treatments.
Install backup aeration systems using venturi valves or air stones connected to blowers that operate during power outages—oxygen depletion can kill your entire fish stock within 2-4 hours during hot weather or high stocking densities. Battery-powered emergency aerators cost ₦50,000-80,000 but protect investments worth hundreds of thousands of naira.
Water Quality Monitoring
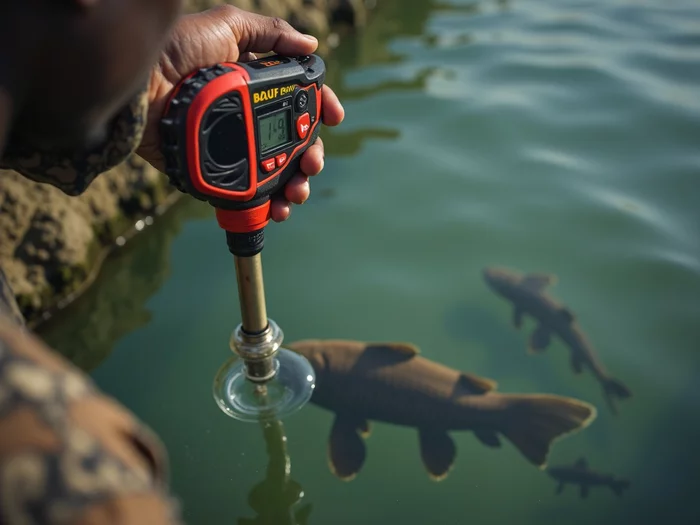
You should test water temperature, pH, dissolved oxygen, and ammonia levels daily during the first month after stocking, then weekly throughout your production cycle to identify problems before they affect fish health. Use digital metres for accurate temperature and pH readings, as test strips often give unreliable results that lead to incorrect management decisions.
Maintain water temperature between 25-32°C for optimal catfish growth—temperatures below 20°C slow growth significantly, whilst temperatures above 35°C stress fish and reduce feed intake. Use shade cloth or deeper water areas to moderate temperature extremes, particularly in northern regions where seasonal temperature variations are more pronounced.
Record all water quality data in a management logbook alongside feeding records, weather observations, and fish behaviour notes. This information helps you identify patterns and predict when water quality problems are likely to occur, allowing preventive management rather than emergency responses that often come too late to prevent losses.
Seasonal Water Management Adjustments
You need to increase aeration and reduce feeding rates during hot, dry seasons when water temperatures rise above 30°C and oxygen levels naturally decrease due to reduced solubility and increased fish metabolism. Monitor dissolved oxygen levels more frequently during these periods, particularly in early morning hours when overnight respiration has depleted oxygen levels.
During rainy seasons, manage pond water levels carefully to prevent overflow that carries fish away whilst avoiding dilution of water chemistry from excessive rainwater inflow. Install overflow pipes or spillways that maintain consistent water levels whilst preventing structural damage to pond levees from excessive water pressure.
Effective dissolved oxygen management becomes critical during seasonal transitions when temperature and weather patterns change rapidly.
Troubleshooting Common Pond Preparation Issues
Even with careful planning and proper construction techniques, you'll encounter challenges that require quick identification and effective solutions to prevent costly production losses. Understanding common pond preparation problems and their remedies helps you respond appropriately when issues arise, often saving your fish stock and avoiding expensive reconstruction work.
Most pond problems develop gradually, giving you time to implement corrections if you recognise early warning signs and understand the underlying causes. Rapid response to seepage, pH imbalances, and water retention issues prevents minor problems from becoming major failures that require complete pond reconstruction or fish stock replacement.
Learning to diagnose and fix common issues builds your confidence as a catfish farmer whilst protecting your investment in infrastructure and fish stock. These troubleshooting skills become increasingly valuable as you expand your operation and manage multiple ponds with varying conditions and challenges.
Addressing Pond Leaks
You can identify pond leaks by monitoring water level drops exceeding 2-3 centimetres per day, which indicates seepage beyond normal evaporation rates in African climates. Walk around your pond perimeter during dry weather, looking for wet spots, green vegetation, or soft ground that indicates underground water movement from your pond to surrounding areas.
For small leaks in earth ponds, drain the water level below the leak point and apply bentonite clay mixed with soil at a 1:3 ratio, compacting thoroughly over the affected area. Allow the repair to dry for 48-72 hours before refilling, ensuring proper bonding between the bentonite seal and existing pond walls or bottom.
Major structural leaks require more extensive repairs—drain the pond completely, remove loose soil from the leak area, and rebuild using proper compaction techniques with bentonite addition. This repair process takes 1-2 weeks but prevents ongoing water losses that can cost ₦20,000-50,000 monthly in replacement water and increased pumping costs.
Managing pH Imbalance
You'll recognise pH problems through fish behaviour changes—lethargy, reduced feeding, or gasping at the surface indicate pH levels outside the 6.5-8.5 range that African catfish can tolerate. Test pH immediately when you observe these symptoms, as rapid pH changes can kill fish within hours if not corrected promptly.
For low pH conditions below 6.5, add agricultural limestone at 100-200kg per hectare, spreading evenly across the pond surface and allowing 24-48 hours for gradual pH adjustment. Never add large amounts of lime at once, as rapid pH changes shock fish more severely than gradual corrections that allow physiological adaptation.
High pH above 8.5 requires acidification using organic matter additions like composted manure or commercial pH reducers available from aquaculture suppliers. Add organic matter gradually over several days, monitoring pH changes to prevent overcorrection that swings pH too far in the opposite direction.
Improving Water Retention
You can reduce excessive water loss through improved soil sealing using bentonite clay applications at 1-2kg per square metre, mixed into the top 10 centimetres of pond bottom and walls. This treatment works best when applied to drained ponds, allowing proper incorporation and compaction before refilling with water.
Install plastic liner systems in ponds with sandy or rocky soils that cannot achieve adequate water retention through soil amendments alone. Use 0.5-1.0mm HDPE liner over a sand base, securing edges properly to prevent wind damage and punctures from sharp objects or animal traffic.
Consider concrete sealing for permanent installations where long-term water retention is critical—apply concrete render at 2-3cm thickness over properly prepared earth surfaces, curing for 14-21 days before filling with water. This method costs ₦1,500-2,500 per square metre but provides decades of reliable service with minimal maintenance requirements.
Ongoing Pond Maintenance
Your pond preparation work doesn't end when you stock your first fingerlings—ongoing maintenance preserves the foundation you've built whilst adapting to changing conditions throughout multiple production cycles. Regular maintenance prevents small problems from becoming expensive repairs whilst maintaining the optimal environment your catfish need for consistent growth and health.
Successful catfish farmers understand that maintenance costs represent insurance against production losses and major reconstruction expenses. A well-maintained pond produces consistently for 10-15 years with minimal major repairs, whilst neglected ponds require expensive rehabilitation every 2-3 years that disrupts production schedules and reduces profitability.
Developing systematic maintenance routines helps you identify potential problems early whilst spreading maintenance costs evenly throughout the year rather than facing large unexpected expenses during critical production periods. Your maintenance approach should balance immediate needs with long-term pond preservation to maximise your infrastructure investment.
Routine Care and Monitoring
You should inspect your pond levees, inlet and outlet structures, and aeration systems weekly to identify wear, damage, or blockages that could affect water quality or structural integrity. Look for erosion channels, soft spots in levees, or vegetation growth that indicates seepage problems requiring immediate attention before they worsen.
Clean inlet screens and filters monthly to maintain proper water flow and prevent debris accumulation that reduces system efficiency. Remove accumulated sediment from pond bottoms between production cycles, as organic matter buildup creates anaerobic conditions that produce toxic gases and reduce water quality in subsequent stocking cycles.
Maintain detailed records of all maintenance activities, costs, and observations in your pond management logbook. This information helps you predict when major maintenance will be needed and budget accordingly, whilst providing valuable data for insurance claims or equipment warranty issues that may arise.
Seasonal Adjustments
You need to prepare your ponds for seasonal weather patterns that affect water levels, temperature, and structural integrity throughout the year. Before rainy seasons, clear drainage channels around pond perimeters and check spillway systems to prevent overflow damage during heavy rainfall periods common across West and East Africa.
During dry seasons, monitor water levels more closely and prepare backup water sources before shortages become critical. Apply protective coverings or shade cloth to prevent excessive evaporation and temperature extremes that stress fish and increase water replacement costs significantly.
Adjust maintenance schedules based on seasonal accessibility—complete major repairs during dry seasons when pond drainage and equipment access are easier, whilst focusing on routine monitoring and minor adjustments during wet periods when extensive construction work becomes impractical.
Managing Aquatic Plants and Pests
You must control excessive aquatic vegetation that competes with fish for oxygen and creates hiding places for predators and disease organisms. Remove floating plants like water hyacinth manually or use biological controls, as chemical herbicides can harm your catfish and contaminate water supplies used for human consumption.
Install screens or barriers to prevent wild fish, frogs, and other aquatic animals from entering your ponds and competing with your catfish for food or introducing diseases. Check these barriers regularly for damage and repair immediately, as small openings allow entry of unwanted species that are difficult to remove once established.
Use integrated pest management approaches that combine physical removal, biological controls, and selective treatments to maintain balanced pond ecosystems without relying heavily on chemicals that increase production costs and may affect fish health or marketability.
Summary Table
| Key Points | Details |
|---|---|
| Soil Composition | Ideal soil contains 20-30% clay, 40-50% silt, 20-30% sand for proper water retention. |
| Drainage & Flood Risk | Position ponds at least 50m from water bodies and 10m above flood levels; gentle slopes of 1-2% help drainage. |
| Sunlight Exposure | Aim for 6-8 hours of direct sunlight; optimal water temperature for growth is 25-32°C. |
| Soil Preparation Time | Soil preparation and testing should take 2-3 weeks before stocking. |
| Compaction & Sealing | Compact soil to 95% density; use 1-2 kg of bentonite clay/m² for sealing if clay content is low. |
| Soil pH Range | Optimal pH for African catfish is 7.0-8.0; action needed if pH is outside 6.5-8.5 range. |
| Fertilisation Timing | Fertilise 7-10 days after filling; use organic (500-1000 kg/ha) or inorganic fertiliser (100-150 kg/ha). |
| Water Supply Requirement | Ensure a water source supplying 150-200% of total pond volume for evaporation and emergencies. |
| Routine Monitoring | Test water quality daily for the first month, then weekly; monitor temperature (25-32°C) and oxygen levels (>5 mg/L). |
Conclusion
Proper pond preparation and soil testing form the foundation of successful catfish farming operations. By selecting sites with adequate clay content, testing soil chemistry, and preparing your pond bottom correctly, you create stable conditions that support consistent fish growth and reduce ongoing maintenance costs. These preparation steps take time but prevent expensive problems that can affect multiple production cycles.
You now have the technical knowledge to evaluate sites, test soil conditions, and prepare ponds that maintain water quality naturally. Start with thorough site assessment and soil testing before construction begins. Your investment in proper preparation pays dividends through better water retention, stable pH levels, and healthier growing conditions for your African catfish.
With your pond foundation established correctly, focus next on developing effective feeding strategies and stocking management practices. These production elements work together—well-prepared ponds provide the stable environment where proper feeding and stocking techniques can deliver optimal growth rates and profitability for your catfish farming operation.
Frequently Asked Questions
How can I improve water retention if my pond soil has low clay content?
If your soil test reveals less than 20% clay, you can add bentonite clay to improve water retention. Mix 1-2 kilograms of bentonite per square metre into the pond bottom before final compaction. This material swells when wet, creating an effective seal that significantly reduces water seepage.
What are the ideal soil pH and alkalinity levels for African catfish ponds?
For African catfish (Clarias gariepinus), your soil pH should ideally be between 7.0-7.5, though a range of 6.5-8.0 is tolerable. Alkalinity levels between 50-150 mg/L are optimal, providing essential buffering capacity against sudden pH fluctuations. Test your soil and adjust with agricultural limestone or sulphur as needed before filling the pond.
How deep should I excavate my catfish pond, and what slope is recommended for the walls?
You should excavate your pond to a depth of 1.2-1.5 metres to allow for 1 metre of water depth and 20-30 centimetres of freeboard. It's important to create gentle slopes for the pond walls, ideally a 2:1 ratio (horizontal to vertical), to prevent collapse and provide a stable environment for your African catfish.
When is the best time to fertilise a newly filled catfish pond?
You should fertilise your pond 7-10 days after filling it with water, allowing time for the initial water chemistry to stabilise. This timing helps establish beneficial algae populations that produce oxygen and natural fish food before you introduce your fingerlings. Monitor water colour to guide subsequent applications.
What are the signs of a pond leak, and how can I fix small ones?
Pond leaks are indicated by water level drops exceeding 2-3 centimetres per day, beyond normal evaporation. Look for wet spots or unusually green vegetation around your pond perimeter. For small leaks in earth ponds, drain the water below the leak point, then apply bentonite clay mixed with soil (1:3 ratio) and compact it thoroughly.


Yomi Adisa Lead Researcher
Yomi Adisa is the lead researcher at Fish Farming Business, where he studies what makes aquaculture ventures profitable across Africa. His research focuses on market patterns, buyer preferences, and the business decisions that determine success or failure in fish farming.